Now you have a basic idea of drawing graphics, we will learn how to incorporate these graphics into a document. Lets use the Atwood machine you drew in exercise 1 for our example graphic.
First, group all the components of the graphic together. For beginners, you should group together subjects (the ring-stand, the pulley and weights, the counter and countertop). Then you can group all the sub-objects together along with the text to create only one object. Now you should be able to move the figure around as one. An easy way to select multiple objects for grouping is to use the select objects tool in the drawing toolbar (refer to drawing toolbar page). Simply draw a rectangle around the object you want selected. You can deselect objects from a group of selected objects by holding shift and clicking on the object you wish to deselect.
Now, right-click this grouped object and choose Format Object. Click on the Layout tab. Now you should see a series of pictures of a dog and lines that represent text. These are the different ways you can "wrap" the text around the object or let the text go right through the object. Let take a look at each of these choices:
I will attempt to explain what each of these "layouts" do. However, to truly understand them, you should try each one. Open up a document or copy some random article from the net. Then try to incorporate your Atwood machine figure using each of these layouts:
 |
In line with text - Word treats the object as part of the text. In other words, the object acts like a word that you type. You can press enter to move it to the next line. This method is good for small pictures, equations (from Microsoft Equation) or large figures that take up the whole width of the paper. |
 |
Square - This allocates an square or rectangle in the text where the figure appears. This is the most common type of wrapping for figures. |
 |
Tight - This allocates a space for your figure in the text by tracing the actual borders of the figure (e.g. If you drew a triangle, it would create a triangular space in the text where your figure appears). This does not work for inserted pictures (JPEGs, BMPs, etc.) because Word recognizes them as solid rectangles (thus, it has the same effect as Square). |
 |
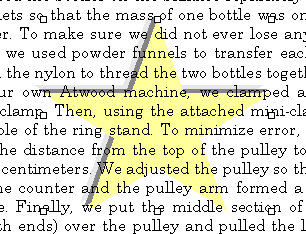
Behind text - This keeps the original position of the text and puts the figure "behind" it. This is useful if you wish to create a watermark (a light background symbol). However, you might also need to choose very light colors for the figure. |
 |
In front of text - This keeps the original position of the text and puts the figure in front of it. It will cover up text. You will rarely use this effect. I cannot think of any uses off the top of my head. Email me with ideas... |
Here are the effects applied:

In line with text

Square

Tight
Behind text

In front of text
Often times, a figure looks better with a border around it. You can add a border easily. First, make sure that the figure has been grouped. Then, simply set the line color of the figure to your desired border color. You can also change the other settings for the line (style, dash, thickness) and they will correspond to the border.